Difference between revisions of "Barbarians - F3"
Lestodante (talk | contribs) (Created page with "The purpose of this page is to display images of the slottabased F3 Barbarian figures identified with their proper names. - Designed by Alan & Michael Perry, Bob Naismith -...") |
Lestodante (talk | contribs) m (→F3 Barbarians) |
||
| (20 intermediate revisions by the same user not shown) | |||
| Line 1: | Line 1: | ||
| − | The purpose of this page is to display images of the slottabased F3 | + | The purpose of this page is to display images of the slottabased F3 Barbarians figures identified with their proper names.<br> |
| + | Designed by Alan & Michael Perry, Bob Naismith.<br> | ||
| + | ''Some pictures from Citadel flyers have been used as place holders waiting for other members to contribute by uploading pictures of the missing figures to complete the range.'' | ||
| − | |||
| + | === F3 Barbarians === | ||
<gallery> | <gallery> | ||
| − | + | file:F3-01.jpg|<center>Gudrud (Hawkwing the Slayer) | |
| − | file:F3-01.jpg|<center>Gudrud | ||
file:F3-02.jpg|<center>Arnulf | file:F3-02.jpg|<center>Arnulf | ||
file:F3-03.jpg|<center>Jochi | file:F3-03.jpg|<center>Jochi | ||
| Line 15: | Line 16: | ||
file:F3-08.jpg|<center>Sighvat | file:F3-08.jpg|<center>Sighvat | ||
file:F3-09.jpg|<center>Gerloc | file:F3-09.jpg|<center>Gerloc | ||
| + | file:F3-24.jpg|<center>Gerloc 2 | ||
file:F3-10.jpg|<center>Rhora | file:F3-10.jpg|<center>Rhora | ||
file:F3-11.jpg|<center>Thrull | file:F3-11.jpg|<center>Thrull | ||
file:F3-12.jpg|<center>Temusin | file:F3-12.jpg|<center>Temusin | ||
file:F3-13.jpg|<center>Sokti | file:F3-13.jpg|<center>Sokti | ||
| − | file:F3-14.jpg|<center> | + | file:F3-14.jpg|<center>Denar |
file:F3-15.jpg|<center>Brunhilda | file:F3-15.jpg|<center>Brunhilda | ||
file:F3-16.jpg|<center>Sky | file:F3-16.jpg|<center>Sky | ||
file:F3-17.jpg|<center>Hackslash | file:F3-17.jpg|<center>Hackslash | ||
| − | file:F3-18.jpg|<center> | + | file:F3-18.jpg|<center>Gungol |
file:F3-19.jpg|<center>Arkash | file:F3-19.jpg|<center>Arkash | ||
file:F3-20.jpg|<center>Blood | file:F3-20.jpg|<center>Blood | ||
| − | file:F3-21.jpg|<center>Thring | + | file:F3-21.jpg|<center>Thring/Gelda |
file:F3-22.jpg|<center>Theodor | file:F3-22.jpg|<center>Theodor | ||
| − | file:F3-23.jpg|<center> | + | file:F3-23.jpg|<center>Radd |
| − | |||
file:F3-25.jpg|<center>Angband the Hated | file:F3-25.jpg|<center>Angband the Hated | ||
file:F3-26.jpg|<center>Fatima Shield Maiden | file:F3-26.jpg|<center>Fatima Shield Maiden | ||
| Line 39: | Line 40: | ||
file:F3-32.jpg|<center>Dun-Darach the Slayer | file:F3-32.jpg|<center>Dun-Darach the Slayer | ||
file:F3-33.jpg|<center>Moosehead Skullcrusher | file:F3-33.jpg|<center>Moosehead Skullcrusher | ||
| − | file:F3-34.jpg|<center>Slade the Leveller | + | file:F3-34.jpg|<center>Slade the Leveller<br>(Siegfried Goldenhair) |
file:F3-35.jpg|<center>Ungor Flamescalp | file:F3-35.jpg|<center>Ungor Flamescalp | ||
file:F3-36.jpg|<center>Kolsek the Terrible | file:F3-36.jpg|<center>Kolsek the Terrible | ||
file:F3-37.jpg|<center>Guernica Strongsword | file:F3-37.jpg|<center>Guernica Strongsword | ||
| − | file:F3-38.jpg|<center> | + | file:F3-38.jpg|<center>Frealaf Hardhand |
| − | file:F3-39.jpg|<center> | + | file:F3-39.jpg|<center>Freca Foulbreath |
| − | file:F3-40.jpg|<center> | + | file:F3-40.jpg|<center>Casualty / Wounded |
| + | file:F3-41.jpg|<center>Wounded with Axe | ||
| + | file:F3-42.jpg|<center>Wounded with Spear | ||
| + | </gallery> | ||
| + | |||
| + | === F6 Barbarian Raiders === | ||
| + | <gallery> | ||
| + | file:F3-43.jpg|<center>Sven Barechest | ||
| + | file:F3-44.jpg|<center>Bjorn | ||
| + | file:F3-45.jpg|<center>Wulf Sternaxe | ||
| + | file:F3-46.jpg|<center>Wounded Storri | ||
| + | file:F3-47.jpg|<center>Ragnar Wiseman | ||
| + | file:F3-48.jpg|<center>Egil-Chief of Clans | ||
| + | file:F3-49.jpg|<center>Grim the Urgent | ||
| + | file:F3-50.jpg|<center>Brogi | ||
| + | file:F3-51.jpg|<center>Grotnar Berserk | ||
| + | file:F3-52.jpg|<center>Vragi | ||
| + | file:F3-53.jpg|<center>Harald the Heroic | ||
| + | file:F3-54.jpg|<center>Erik the Archer | ||
| + | file:F3-55.jpg|<center>Storulf | ||
| + | file:F3-56.jpg|<center>Thorolf Moodbrow | ||
| + | file:F3-57.jpg|<center>Wulfric | ||
| + | file:F3-58.jpg|<center>Kveldulf the Brute | ||
| + | </gallery> | ||
| + | |||
| + | === other / uncatalogued === | ||
| + | |||
| + | <gallery> | ||
| + | file:F3-59.jpg|<center>Crownad Dogsbreath | ||
| + | file:F3-60.jpg|<center> | ||
| + | file:Unreleased_-_Heroquest_Fighter.jpg|<center>Unreleased Heroquest Barbarian | ||
| + | file:F3-61.jpg|<center>Luthan Tyrant of the Badlands | ||
| + | file:F3-62.jpg|<center>Halamai Huntress of the Darkwoods | ||
| + | file:F3-63.jpg|<center>Berzerker | ||
| + | file:F3-64.jpg|<center>Flail-Hide the Destroyer | ||
| + | file:F3-65.jpg|<center>Berserker | ||
| + | file:F3-66.jpg|<center>Nigel | ||
| + | file:F3-67.jpg|<center>Helena the Swift | ||
| + | file:F3-68.jpg|<center> | ||
| + | file:F3-69.jpg|<center> | ||
| + | |||
</gallery> | </gallery> | ||
Latest revision as of 13:04, 30 June 2016
The purpose of this page is to display images of the slottabased F3 Barbarians figures identified with their proper names.
Designed by Alan & Michael Perry, Bob Naismith.
Some pictures from Citadel flyers have been used as place holders waiting for other members to contribute by uploading pictures of the missing figures to complete the range.
F3 Barbarians
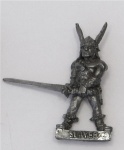
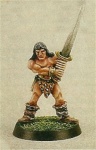
Gudrud (Hawkwing the Slayer) 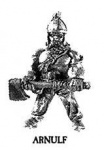
Arnulf 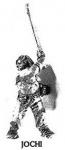
Jochi 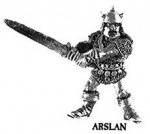
Arslan 
Raolak 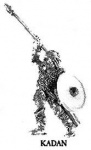
Kadan 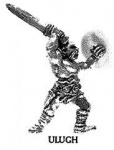
Ulugh 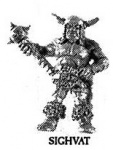
Sighvat 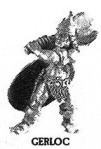
Gerloc 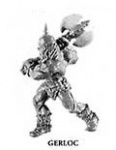
Gerloc 2 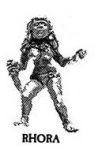
Rhora 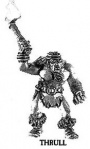
Thrull 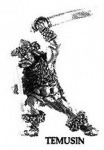
Temusin 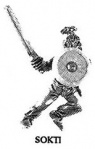
Sokti 
Denar 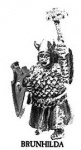
Brunhilda 
Sky 
Hackslash 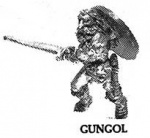
Gungol 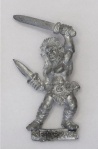
Arkash 
Blood 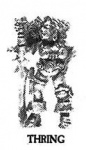
Thring/Gelda 
Theodor 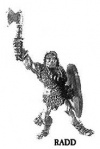
Radd 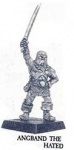
Angband the Hated 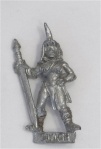
Fatima Shield Maiden 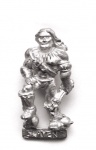
Drax Headstrong 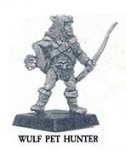
Wulf Pet Hunter 
Davalos Tvaritch 
Kloob Mighty Axe 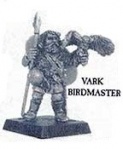
Vark Birdmaster 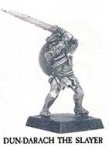
Dun-Darach the Slayer 
Moosehead Skullcrusher 
Slade the Leveller
(Siegfried Goldenhair)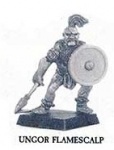
Ungor Flamescalp 
Kolsek the Terrible 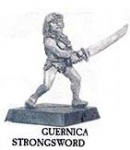
Guernica Strongsword 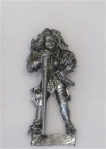
Frealaf Hardhand 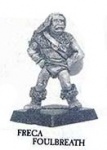
Freca Foulbreath 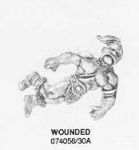
Casualty / Wounded 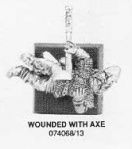
Wounded with Axe 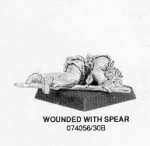
Wounded with Spear


F6 Barbarian Raiders
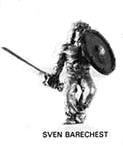
Sven Barechest 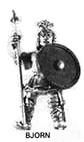
Bjorn 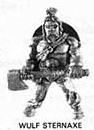
Wulf Sternaxe 
Wounded Storri 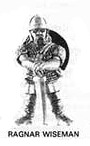
Ragnar Wiseman 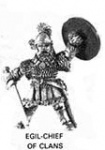
Egil-Chief of Clans 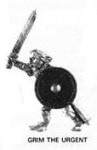
Grim the Urgent 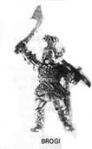
Brogi 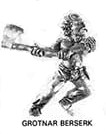
Grotnar Berserk 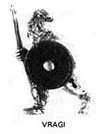
Vragi 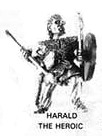
Harald the Heroic 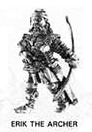
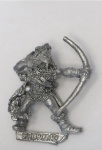
Erik the Archer 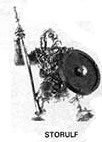
Storulf 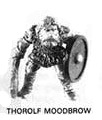
Thorolf Moodbrow 
Wulfric 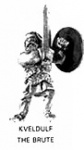
Kveldulf the Brute


other / uncatalogued
Crownad Dogsbreath 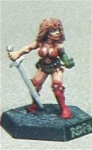
Unreleased Heroquest Barbarian 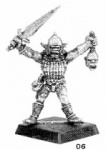
Luthan Tyrant of the Badlands 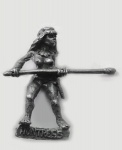
Halamai Huntress of the Darkwoods 
Berzerker 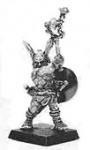
Flail-Hide the Destroyer 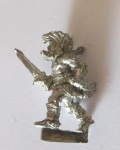
Berserker 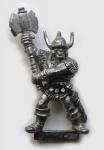
Nigel Helena the Swift


