Difference between revisions of "Fantasy Specials - FS"
Redxen2003 (talk | contribs) |
|||
| (16 intermediate revisions by 6 users not shown) | |||
| Line 2: | Line 2: | ||
<gallery> | <gallery> | ||
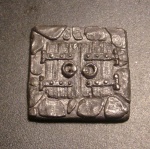
| − | + | file:Fsimage1.jpg|FS1-1 Dungeon Doorway | |
| − | + | file:Fsimage2.jpg|FS1-2 Dungeon Doorway | |
| − | + | file:Fsimage3.jpg|FS2-1 Magic Mouth Doorway | |
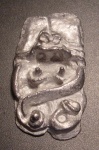
| − | + | file:Fsimage4.jpg|FS2-2 Necromancer with Female Sacrifice on Altar (3 pcs) | |
| − | + | file:Fsimage5.jpg|FS3-1 Demon Floor Trap | |
| − | + | file:Fsimage6.jpg|FS3-2 Demon Doorway (Portal of Chaos) | |
| − | + | file:Fsimage7.jpg|FS4-1 Living Wall | |
| − | + | file:Fsimage8.jpg|FS4-2 Trapdoors (2 pcs) | |
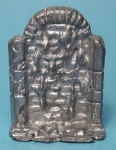
| − | + | file:Fsimage9.jpg|FS5-1 Old Wizard on Throne reading Book on Lectern (3 pcs.) | |
| − | + | file:Fsimage10.jpg|FS5-2 Old Wizard on Throne reading Book on Lectern (3 pcs.) | |
| − | + | file:Fsimage11.jpg|<CENTER>(Missing whip - please replace picture)<BR>FS6-1 Dungeon Torturess with Whip. | |
| − | + | file:Fsimage12.jpg|FS6-2 Dungeon Torturess with Whip. | |
| − | + | file:FS6-3.jpg|FS6-3 Dungeon Torturess with Sword. | |
| − | + | file:Fsimage13.jpg|FS7-1 Naked Girl bound Hand and Foot | |
| − | + | file:Fsimage14.jpg|FS7-2 Naked Girl bound Hand and Foot | |
| − | + | file:Fsimage15c.jpg|FS8-1 Naked Girls bound to Post, Cross and Yoke (3 figs.) | |
| − | + | file:Fsimage15a.jpg|FS8-1 Naked Girls bound to Post, Cross and Yoke (3 figs.) | |
| − | + | file:Fsimage15b.jpg|FS8-1 Naked Girls bound to Post, Cross and Yoke (3 figs.) | |
| − | + | file:Fsimage15.jpg|FS8-2 Naked Girls bound to Post, Cross and Yoke (3 figs.) | |
| − | + | file:Fsimage16.jpg|FS8-2 Naked Girls bound to Post, Cross and Yoke (3 figs.) | |
| − | + | file:Fsimage105.jpg|FS8-2 Naked Girls bound to Post, Cross and Yoke (3 figs.) | |
| − | + | file:Fsimage17.jpg|FS9-1 Naked Girl hanging from Wooden Trestle (3 pcs.) | |
| − | + | file:Fsimage18.jpg|FS9-2 Captive Girl in Iron Maiden | |
| − | + | file:Fsimage19.jpg|FS10-1 Naked Girl roasting on Spit over Brazier (4 pcs.) | |
| − | + | file:Fsimage20.jpg|FS10-2 Naked Girl and Rack | |
| − | + | file:Fsimage21.jpg|FS11-1 Hunchback Beggar on Crutch | |
| − | + | file:Fsimage22.jpg|FS11 -2 Hunchback Beggar on Crutch Spring 1982 | |
| − | + | file:Fsimage23.jpg|FS12 Ornate Sarcophagus (2 pcs.) | |
| − | + | file:Fsimage24.jpg|FS13-1 Trapdoor and Floor Grill | |
| − | + | file:Fsimage25.jpg|FS13-2 Magic Window | |
| − | + | file:Fsimage26.jpg|FS14 Dungeon Debris, Equipment and Treasure (3 figs.) | |
| − | + | file:Fsimage27.jpg|FS15 Robin Hood | |
| − | + | file:Fsimage28.jpg|FS16 Wandering Minstrel | |
| − | + | file:Fsimage29.jpg|FS17 The White Dwarf | |
| − | + | file:Fsimage30.jpg|FS18 Rasputin the Mad Monk | |
| − | + | file:Fsimage31.jpg|FS19 Soothsayer | |
| − | + | file:Fsimage32.jpg|FS20 Naked Girl in Stocks | |
| − | + | file:Fsimage33.jpg|FS21 Naked Girl in Pillory | |
| − | + | file:Fsimage34.jpg|FS22-1 Victim in Iron Cage hanging from Gibbet | |
| − | + | file:Fsimage35.jpg|FS22-2 Victim hanging from Gibbet | |
| − | + | file:Fsimage36.jpg|FS23 Tavern, Table and Bench (3 pcs) | |
| − | + | file:Fsimage37.jpg|FS24 Tavern Bed, unmade | |
| − | + | file:Fsimage38.jpg|FS25 Tavern Accessories (Chest, Sacks, Barrel, etc.) | |
| − | + | file:Fsimage39.jpg|FS26-1 Hero's Armour hanging on Post | |
| − | + | file:Fsimage40.jpg|FS26-2 Dungeon Pillars (2) Oct 1982 | |
| − | + | file:Fsimage41.jpg|FS27 Large Treasure Chest | |
| − | + | file:Fsimage42.jpg|FS27 Dungeon Windows (4) Oct 1982 | |
| − | + | file:Fsimage43.jpg|FS28-1 Slain Adventurers (2 figs.) | |
| − | + | file:Fsimage44.jpg|FS28-2 Slain Adventurers (2 figs.) Oct 1982 | |
| − | + | file:Fsimage46.jpg|FS29-1 Expedition Mule | |
| − | + | file:Fsimage45.jpg|FS29-2 Expedition Mule | |
| − | + | file:Fsimage47.jpg|FS30 Naked Girl in Restraining Device | |
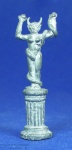
| − | + | file:Fsimage48.jpg|FS31-1 Lion's Head Fountain | |
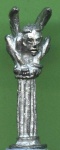
| − | + | file:Fsimage49.jpg|FS31-2 Magic Fountain | |
| − | + | file:Fsimage50.jpg|FS32 Magic Items | |
| − | + | file:Fsimage51.jpg|FS33-1 Witch's Items | |
| − | + | file:Fsimage51A.jpg|FS33-2 Witch's Items | |
| − | + | file:Fsimage53.jpg|FS34 Treasure Items | |
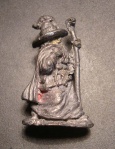
| − | + | file:Fsimage54.jpg|FS35 Idol | |
| − | + | file:Fsimage55a.jpg|FS36-1 Statue | |
| − | + | file:Fsimage56.jpg|FS36-2 Gargoyle Statue | |
| − | + | file:Fsimage57.jpg|FS37 Round Table | |
| − | + | file:Fsimage58.jpg|FS38 Chairs | |
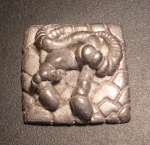
| − | + | file:Fsimage59.jpg|FS39 Large Centipede | |
| − | + | file:Fsimage68.jpg|FS40-1 Large Spider | |
| − | + | file:Fsimage52.jpg|FS40-2 Beetles (Oct 1982) | |
| − | + | file:Fsimage61.jpg|FS41 Large Beetles | |
| − | + | file:Fsimage63.jpg|FS42 Large Bugs | |
| − | + | file:Fsimage64.jpg|FS43-1 Large Grubs | |
| − | + | file:Fsimage65.jpg|FS43-2 Old Wizard with Spell Book (Oct 1982) | |
| − | + | file:Fsimage66.jpg|FS44-1 Large Worms | |
| − | + | file:Fsimage67.jpg|FS44-2 Seductive Wench (Aug 1982) | |
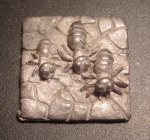
| − | + | file:Fsimage60.jpg|FS45-1 Large Ant | |
| − | + | file:Fsimage69.jpg|FS45-2 Monk with Staff (aka Mysterious Stranger with Staff) | |
| − | + | file:Fsimage70.jpg|FS46-1 Large Slug | |
| − | + | file:Fsimage99.jpg|FS46-2 Brawny Adventurer (Aug 1982) | |
| − | + | file:Fsimage71.jpg|FS47-1 Large Crab | |
| − | + | file:Fsimage72.jpg|FS47-2 Drunk with Club (aka Grumpy Old Boozer) (Aug 1982) | |
| − | + | file:Fsimage73.jpg|FS48 Rats | |
| − | + | file:Fsimage73a.jpg|FS48-2 Knight Errant in plate Armour | |
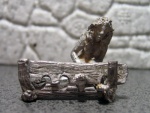
| − | + | file:Fsimage74.jpg|FS49 Sleeping Dog | |
| − | + | file:Fsimage75.jpg|FS49 Barking Dog (Apr 1982) | |
| − | + | file:Fsimage76.jpg|FS50-1 Dragon Eggs | |
| − | + | file:Fsimage77.jpg|FS50-2 Bryan the Wizard (Oct 1982) | |
| − | + | file:Fsimage78.jpg|FS51 Large Scorpion | |
| − | + | file:Fsimage55.jpg|FS52 Large Statue | |
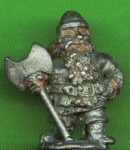
| − | + | file:Fsimage80a.jpg|FS53 Dwarf Guardsman in Plate Armour | |
| − | + | file:Fsimage80.jpg|FS53-1 Dwarf Guardsman in Plate Armour | |
| − | + | file:Fsimage81.jpg|FS53-2 Dwarf Guardsman in Plate Armour August 1982 | |
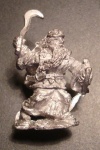
| − | + | file:Fsimage82.jpg|FS54-1 Dwarf Priest | |
| − | + | file:Fsimage83.jpg|FS54-2 Dwarf Priest Oct 1982 | |
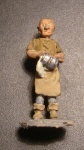
| − | + | file:Fsimage84.jpg|FS55 Little Old Man | |
| − | + | file:Fsimage85.jpg|FS56 Village Idiot | |
| − | + | file:Fsimage86.jpg|FS57 Innkeeper | |
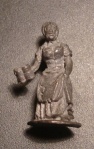
| − | + | file:Fsimage87.jpg|FS58 Innkeeper's Wife | |
| − | + | file:Fsimage88.jpg|FS59 Serving Wench | |
| − | + | file:Fsimage89.jpg|FS60 Villager | |
| − | + | file:Fsimage90.jpg|FS61 Villager's Wife | |
| − | + | file:Fsimage91.jpg|FS62 Village Children | |
| − | + | file:Fsimage92.jpg|FS63 Store Keeper | |
| − | + | file:Fsimage93.jpg|FS64 Money Lender | |
| − | + | file:Fsimage94.jpg|FS65 Seductive Wench Seated | |
| − | + | file:Fsimage95.jpg|FS66 Mysterious Stranger Seated | |
| − | + | file:Fsimage96.jpg|FS67 Brawny Adventurer Seated | |
| − | + | file:Fsimage97.jpg|FS68 Grumpy Old Boozer Seated | |
| − | + | file:Fsimage98.jpg|FS69 Mounted Knight Charging with Lance | |
| − | + | file:Fsimage100.jpg|FS70 Sacrificial Goat | |
| − | + | </gallery> | |
| − | + | ==US Only== | |
| − | + | These codes were only used in the US. | |
| − | + | <gallery> | |
| − | + | file:Fsimage101.jpg|FS71 Zombies with Cleaver | |
| + | file:Fsimage101a.jpg|FS71 Zombies with Cleaver | ||
| + | file:Fsimage103.jpg|FS72 Zombie</gallery> | ||
| + | |||
| + | FS73 and FS74 were designed by Ral Partha. | ||
| + | <gallery> | ||
| + | file:Fsimage104.jpg|FS73 Druid and Bear (2 pcs) Catalogue | ||
| + | file:Fsimage104a.jpg|FS73 Druid and Bear (2 pcs) | ||
| + | file:Fsimage106.jpg|FS74 Demon Beast | ||
</gallery> | </gallery> | ||
[[Category:Research]] | [[Category:Research]] | ||
[[Category:Fantasy]] | [[Category:Fantasy]] | ||
Latest revision as of 06:28, 6 September 2017
The purpose of the page is to catalogue the preslotta Fantasy Specials (FS) line of figures and their variants.
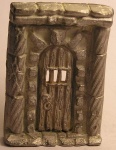
FS1-1 Dungeon Doorway
FS1-2 Dungeon Doorway
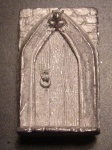
FS2-1 Magic Mouth Doorway
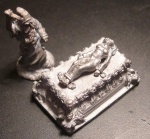
FS2-2 Necromancer with Female Sacrifice on Altar (3 pcs)
FS3-1 Demon Floor Trap
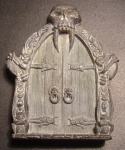
FS3-2 Demon Doorway (Portal of Chaos)
FS4-1 Living Wall
FS4-2 Trapdoors (2 pcs)
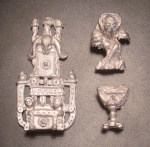
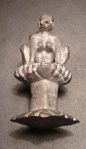
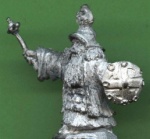
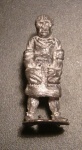
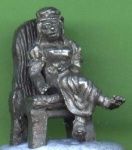
FS5-1 Old Wizard on Throne reading Book on Lectern (3 pcs.)
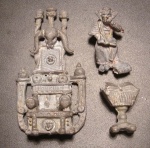
FS5-2 Old Wizard on Throne reading Book on Lectern (3 pcs.)
(Missing whip - please replace picture)
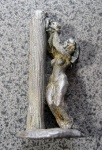
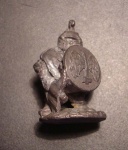
FS6-1 Dungeon Torturess with Whip.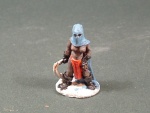
FS6-2 Dungeon Torturess with Whip.
FS6-3 Dungeon Torturess with Sword.
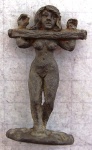
FS7-1 Naked Girl bound Hand and Foot
FS7-2 Naked Girl bound Hand and Foot
FS8-1 Naked Girls bound to Post, Cross and Yoke (3 figs.)
FS8-1 Naked Girls bound to Post, Cross and Yoke (3 figs.)
FS8-1 Naked Girls bound to Post, Cross and Yoke (3 figs.)
FS8-2 Naked Girls bound to Post, Cross and Yoke (3 figs.)
FS8-2 Naked Girls bound to Post, Cross and Yoke (3 figs.)
FS8-2 Naked Girls bound to Post, Cross and Yoke (3 figs.)
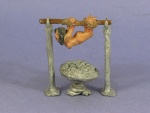
FS9-1 Naked Girl hanging from Wooden Trestle (3 pcs.)

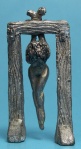
FS9-2 Captive Girl in Iron Maiden
FS10-1 Naked Girl roasting on Spit over Brazier (4 pcs.)
FS10-2 Naked Girl and Rack
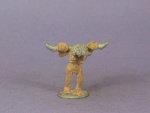
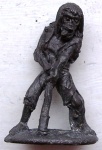
FS11-1 Hunchback Beggar on Crutch
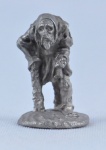
FS11 -2 Hunchback Beggar on Crutch Spring 1982
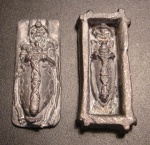
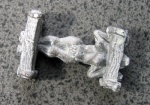
FS12 Ornate Sarcophagus (2 pcs.)
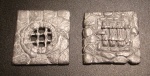
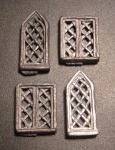
FS13-1 Trapdoor and Floor Grill
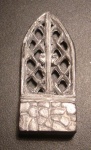
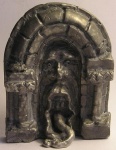
FS13-2 Magic Window
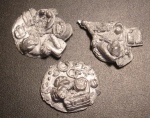
FS14 Dungeon Debris, Equipment and Treasure (3 figs.)
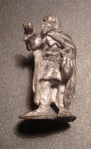
FS15 Robin Hood
FS16 Wandering Minstrel
FS17 The White Dwarf
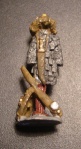
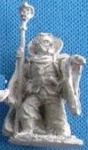
FS18 Rasputin the Mad Monk
FS19 Soothsayer
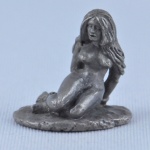
FS20 Naked Girl in Stocks

FS21 Naked Girl in Pillory
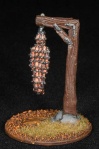
FS22-1 Victim in Iron Cage hanging from Gibbet
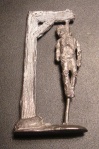
FS22-2 Victim hanging from Gibbet
FS23 Tavern, Table and Bench (3 pcs)
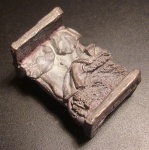
FS24 Tavern Bed, unmade
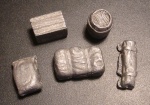
FS25 Tavern Accessories (Chest, Sacks, Barrel, etc.)
FS26-1 Hero's Armour hanging on Post
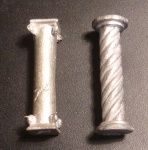
FS26-2 Dungeon Pillars (2) Oct 1982
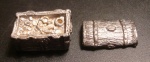
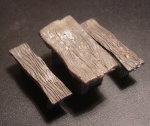
FS27 Large Treasure Chest
FS27 Dungeon Windows (4) Oct 1982
FS28-1 Slain Adventurers (2 figs.)
FS28-2 Slain Adventurers (2 figs.) Oct 1982
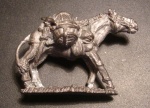
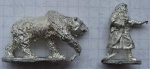
FS29-1 Expedition Mule
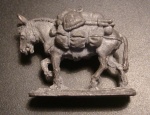
FS29-2 Expedition Mule
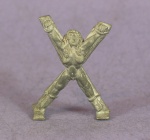
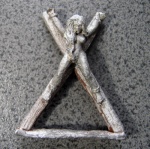
FS30 Naked Girl in Restraining Device
FS31-1 Lion's Head Fountain
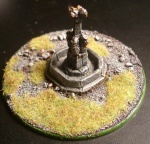
FS31-2 Magic Fountain
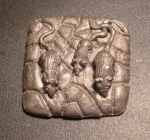
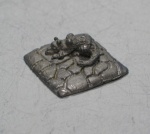
FS32 Magic Items
FS33-1 Witch's Items
FS33-2 Witch's Items
FS34 Treasure Items
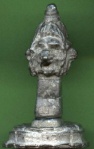
FS35 Idol
FS36-1 Statue
FS36-2 Gargoyle Statue
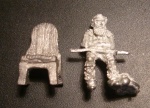
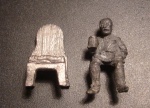
FS37 Round Table
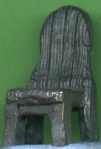
FS38 Chairs
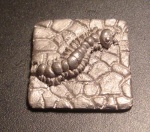
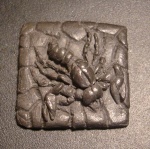
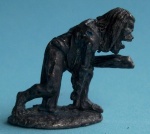
FS39 Large Centipede
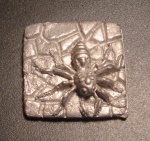
FS40-1 Large Spider
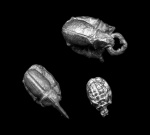
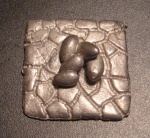
FS40-2 Beetles (Oct 1982)
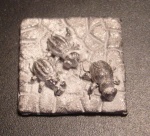
FS41 Large Beetles
FS42 Large Bugs
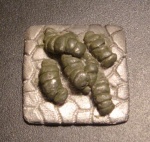
FS43-1 Large Grubs
FS43-2 Old Wizard with Spell Book (Oct 1982)
FS44-1 Large Worms
FS44-2 Seductive Wench (Aug 1982)

FS45-1 Large Ant
FS45-2 Monk with Staff (aka Mysterious Stranger with Staff)

FS46-1 Large Slug
FS46-2 Brawny Adventurer (Aug 1982)
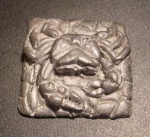
FS47-1 Large Crab
FS47-2 Drunk with Club (aka Grumpy Old Boozer) (Aug 1982)
FS48 Rats
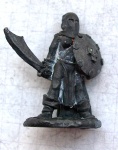
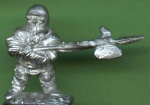
FS48-2 Knight Errant in plate Armour
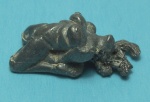
FS49 Sleeping Dog
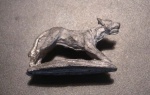
FS49 Barking Dog (Apr 1982)
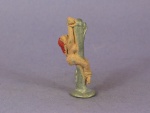
FS50-1 Dragon Eggs
FS50-2 Bryan the Wizard (Oct 1982)
FS51 Large Scorpion
FS52 Large Statue
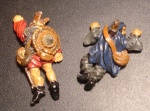
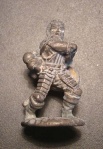
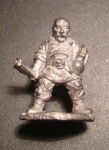
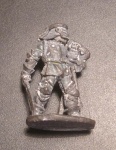
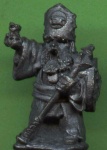
FS53 Dwarf Guardsman in Plate Armour
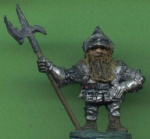
FS53-1 Dwarf Guardsman in Plate Armour
FS53-2 Dwarf Guardsman in Plate Armour August 1982
FS54-1 Dwarf Priest
FS54-2 Dwarf Priest Oct 1982
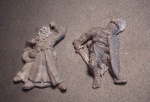
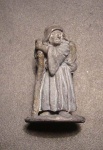
FS55 Little Old Man
FS56 Village Idiot
FS57 Innkeeper

FS58 Innkeeper's Wife
FS59 Serving Wench

FS60 Villager
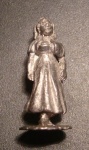
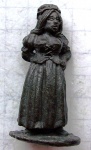
FS61 Villager's Wife
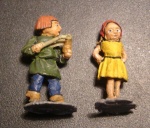
FS62 Village Children
FS63 Store Keeper
FS64 Money Lender
FS65 Seductive Wench Seated

FS66 Mysterious Stranger Seated
FS67 Brawny Adventurer Seated
FS68 Grumpy Old Boozer Seated
FS69 Mounted Knight Charging with Lance
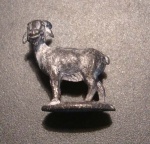
FS70 Sacrificial Goat


US Only
These codes were only used in the US.
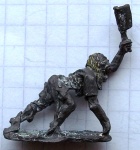
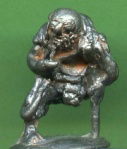
FS71 Zombies with Cleaver
FS71 Zombies with Cleaver
FS72 Zombie


FS73 and FS74 were designed by Ral Partha.
FS73 Druid and Bear (2 pcs) Catalogue

FS73 Druid and Bear (2 pcs)

FS74 Demon Beast


